 English
 中文简体
中文简体News Category:
Key Words:
-
 Feb 19,2024 Forwell
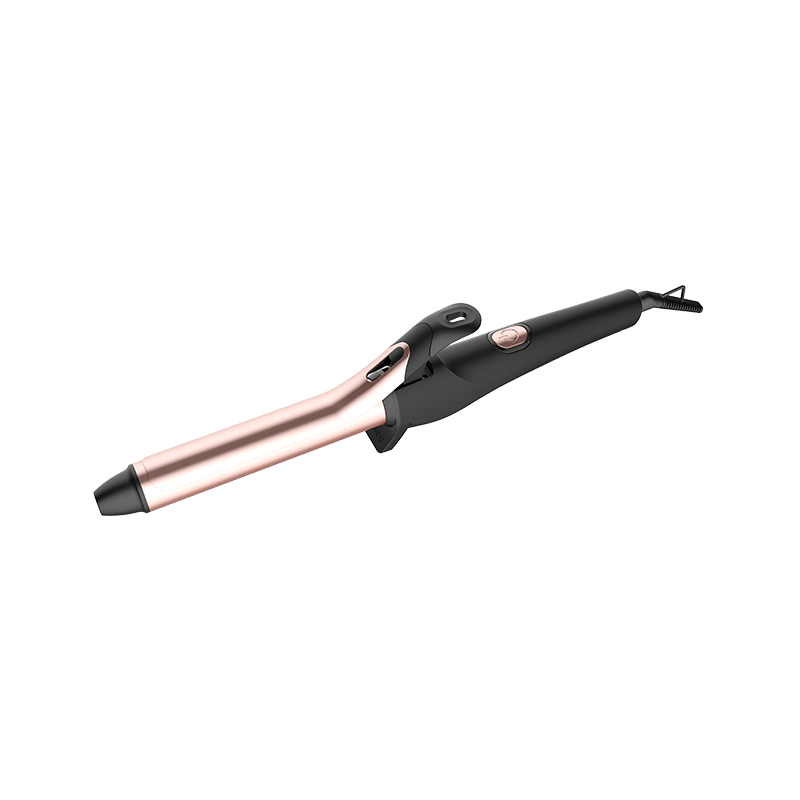
How does the shape of the barrel, such as straight, tapered, or conical, influence the type of curls produced?
The shape of the barrel in a curling iron significantly influences the type of curls produced. Different barrel shapes create varying curl styles, making it important for users to choose a barrel shape that aligns with their desired look. Here's how the shape of the barrel impacts the curls: Straight Barrel:A straight barrel produces uniform and consistent curls from top to bottom. It is suitable for creating classic curls or waves with a consistent diameter. Tapered Barrel:A tapered barrel is narrower at one end and wider at the other. Tapered barrels are ideal for creating natural-looking curls with a looser finish at the roots and tighter curls at the ends. Conical Barrel:A conical barrel is wider at the base and gradually narrows toward the tip. Conical barrels are versatile, allowing users to achieve a range of curls from loose waves at the base to tighter curls or ringlets at the tip. Reverse Conical Barrel:The reverse conical barrel is wider at the tip and gradually narrows toward the base. This shape creates curls with more volume at the roots and a softer finish at the ends. Bubble or Pearl Barrel:A bubble or pearl barrel features various-sized rounded sections along its length. This barrel shape produces playful and textured curls with a more natural appearance. Triple Barrel:The triple barrel, also known as a wave or crimping iron, has three parallel barrels. It creates S-shaped waves or crimps in the hair for a unique and textured look. Oval or Elliptical Barrel:An oval or elliptical barrel is wider in one direction and narrower in the other. This shape allows users to create curls that are wider in one dimension, resembling beachy waves. The choice of barrel shape depends on the type of curls or waves the user wants to achieve and their personal styling preferences. Additionally, the length of the hair and the technique used during styling also play a role in determining the final result. Experimenting with different barrel shapes allows users to create a variety of hairstyles and find the one that suits their desired look.
VIEW FULL ARTICLE -
 Feb 12,2024 Forwell
What types of coatings or materials are commonly used on the barrel of Voltage Hot Air Brushes to enhance styling results?
The barrel of Voltage Hot Air Brushes often features coatings or materials designed to enhance styling results and protect the hair during the styling process. Here are common types of coatings and materials used on the barrels: Ceramic Coating: Ceramic is a popular choice for coating the barrels of Hot Air Brushes. It provides even heat distribution, reducing hot spots and preventing hair damage. Ceramic coatings contribute to a smoother glide, reducing friction and snagging while styling. Tourmaline Coating: Tourmaline is a semi-precious gemstone that is often crushed into a fine powder and infused into the ceramic coating. Tourmaline helps produce negative ions, which reduce frizz and enhance shine. The tourmaline coating contributes to smoother and silkier hair. Titanium Coating: Titanium barrels are lightweight and offer high heat conductivity. Titanium Hot Air Brushes heat up quickly and can reach higher temperatures. Titanium coatings are durable and provide a smooth surface for efficient styling. Ionic Technology: Some Hot Air Brushes incorporate ionic technology in the barrel coating. Ionic technology generates negative ions to neutralize positive ions in the hair, reducing static and frizz. The result is smoother and more manageable hair. Nano Technology: Nano materials are often used to create a fine and smooth surface on the barrel. Nano technology allows for precise styling and helps in achieving sleek results. Nano-coated barrels contribute to a snag-free experience. Aluminum Coating: Aluminum-coated barrels are lightweight and provide efficient heat distribution. They are commonly used in less expensive Hot Air Brushes. Aluminum coatings can contribute to cost-effective styling tools. Gold or Rose Gold Plating: Some premium Hot Air Brushes feature barrels with gold or rose gold plating. These materials provide a luxurious appearance. Gold or rose gold plating may offer additional benefits such as even heat distribution and reduced friction. Teflon Coating: Teflon is known for its non-stick properties. Hot Air Brushes with Teflon-coated barrels can reduce friction and prevent hair from sticking to the surface. Teflon coatings contribute to smooth and effortless styling. Anti-Static Coating: Anti-static coatings are designed to minimize static electricity in the hair. This helps in reducing frizz and promoting a sleek finish. Anti-static coatings enhance the manageability of the hair. The choice of coating or material depends on the desired styling results, hair type, and personal preferences. Additionally, users should consider the overall design and features of the Hot Air Brush, including the size and shape of the barrel, to achieve optimal styling outcomes.
VIEW FULL ARTICLE -
 Feb 05,2024 Forwell
Are there different heat settings available in Voltage Hot Air Brushes, and how should users choose the appropriate setting for their hair type?
many Voltage Hot Air Brushes come equipped with multiple heat settings to accommodate different hair types and styling preferences. The availability of adjustable heat settings is a valuable feature that allows users to customize the styling experience based on their specific needs. Here's how users can choose the appropriate heat setting for their hair type: Fine or Damaged Hair: Choose lower heat settings, typically in the range of 250°F to 300°F. Lower temperatures are gentler on fine or damaged hair, minimizing the risk of heat-related damage. Normal or Average Hair: Medium heat settings, ranging from 300°F to 350°F, are generally suitable for normal or average hair. This temperature range provides effective styling without excessive heat exposure. Thick or Coarse Hair: Select higher heat settings, usually in the range of 350°F to 400°F, for thick or coarse hair. Higher temperatures help in taming and styling thicker hair effectively. Curling or Waving: For users looking to create curls or waves, a medium to high heat setting may be appropriate, depending on hair thickness. Experiment with different temperatures to find the balance between effective styling and minimizing heat damage. Versatility: Opt for a Voltage Hot Air Brush with adjustable heat settings if you have versatile styling needs. Being able to switch between different temperatures allows for flexibility in achieving various hairstyles. Preventing Heat Damage: If you are concerned about heat damage, start with lower heat settings and gradually increase if necessary. Consider using a heat protectant spray on your hair before styling to minimize potential damage. Testing: It's a good practice to test the heat settings on a small section of hair first to ensure that the chosen temperature is suitable. Assess how your hair responds to the selected heat level before styling larger sections. Personal Preference: Some users may prefer lower heat settings for a more gradual and controlled styling process, while others may opt for higher temperatures for quicker results. Consider your personal preference and the time you are willing to spend on styling. Cool Shot Function: Many Hot Air Brushes come with a cool shot function. After styling, using the cool shot can help set the hairstyle and add shine while minimizing heat exposure. Always refer to the manufacturer's guidelines and recommendations for the specific Voltage Hot Air Brush model you are using. It's essential to prioritize the health of your hair and adjust the heat settings based on its unique characteristics and styling requirements.
VIEW FULL ARTICLE -
 Jan 29,2024 Forwell
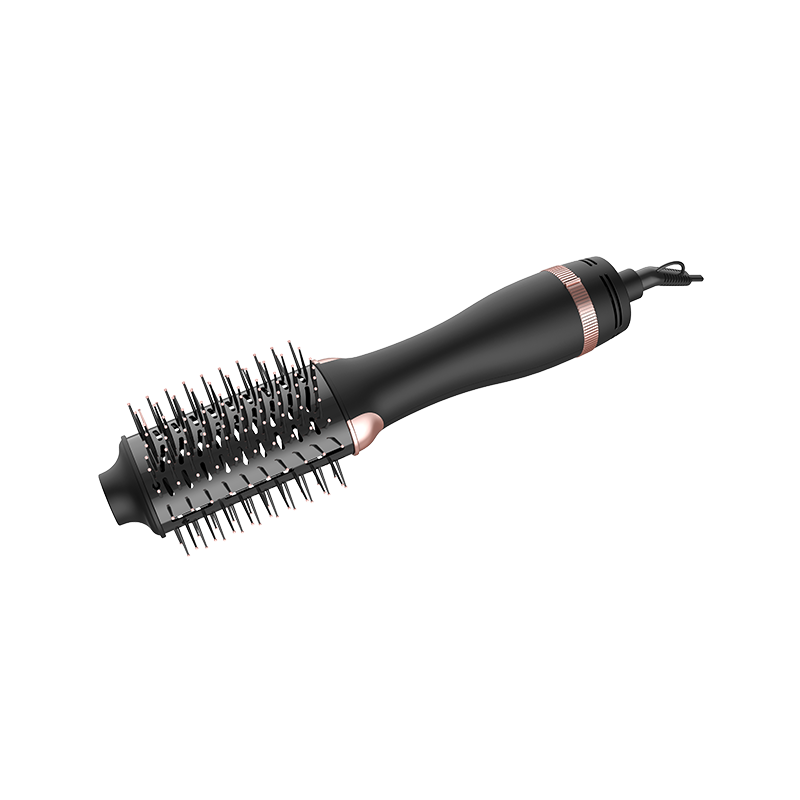
Brush Bristles of voltage hot air brush
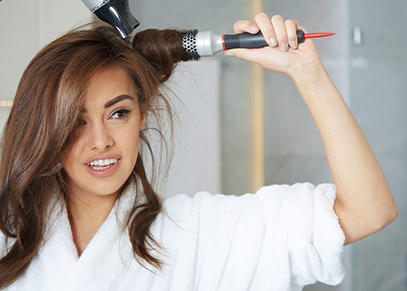
The brush bristles of a voltage hot air brush play a crucial role in achieving effective styling results. These bristles are designed to detangle, smooth, and style the hair as the hot air brush is used. Here are some common features and considerations regarding the brush bristles of voltage hot air brushes: Material: Bristles can be made from various materials, such as nylon, boar bristle, ceramic, or a combination. The choice of material affects how the bristles interact with the hair. Nylon Bristles: Nylon bristles are commonly used for their flexibility and durability. They are effective in detangling hair and providing a smooth finish during styling. Boar Bristles: Boar bristle brushes are known for their natural and gentle texture. They distribute natural oils along the hair shaft, contributing to shine and smoothness. Ceramic Bristles: Some hot air brushes incorporate ceramic-infused bristles. Ceramic helps in distributing heat evenly, reducing the risk of hot spots and minimizing hair damage. Anti-Static Properties: Many brush bristles are designed with anti-static properties to help reduce frizz and flyaways during styling. This is particularly beneficial for achieving a polished and sleek finish. Ionic Technology: Bristles may be infused with ionic technology. Negative ions emitted during styling help neutralize positive ions in the hair, reducing static electricity and promoting smoother, shinier hair. Flexible vs. Firm Bristles: The flexibility of the bristles can vary. Flexible bristles are often gentler on the hair, while firmer bristles may provide better tension for creating styles with more control. Length and Density: The length and density of the bristles impact their ability to penetrate through the hair, ensuring even heat distribution and effective styling. Rotating or Detachable Bristles: Some hot air brushes have rotating or detachable bristles, allowing for easy cleaning and preventing hair from getting tangled around the brush. Bristle Configuration: The arrangement of the bristles on the brush head can vary. Some brushes have a single row, while others have multiple rows or staggered configurations. This affects how the brush grips and styles the hair. Cool-Tip Bristles: Some hot air brushes feature cool-tip bristles at the ends to prevent scalp burns and provide a comfortable styling experience. Compatibility with Hair Types: Consideration is given to how well the bristles work with different hair types, such as fine, thick, curly, or straight hair. When choosing a voltage hot air brush, it's important to consider the type of bristles that will best suit your hair type and styling preferences. The bristles play a significant role in achieving the desired hairstyle while ensuring the health and condition of the hair.
VIEW FULL ARTICLE -
 Jan 22,2024 Forwell
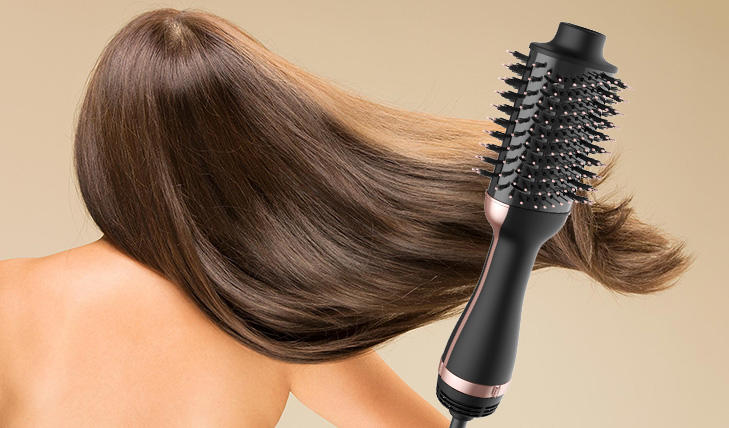
How does the voltage hot air brush combine the functions of a hairdryer and a styling brush?
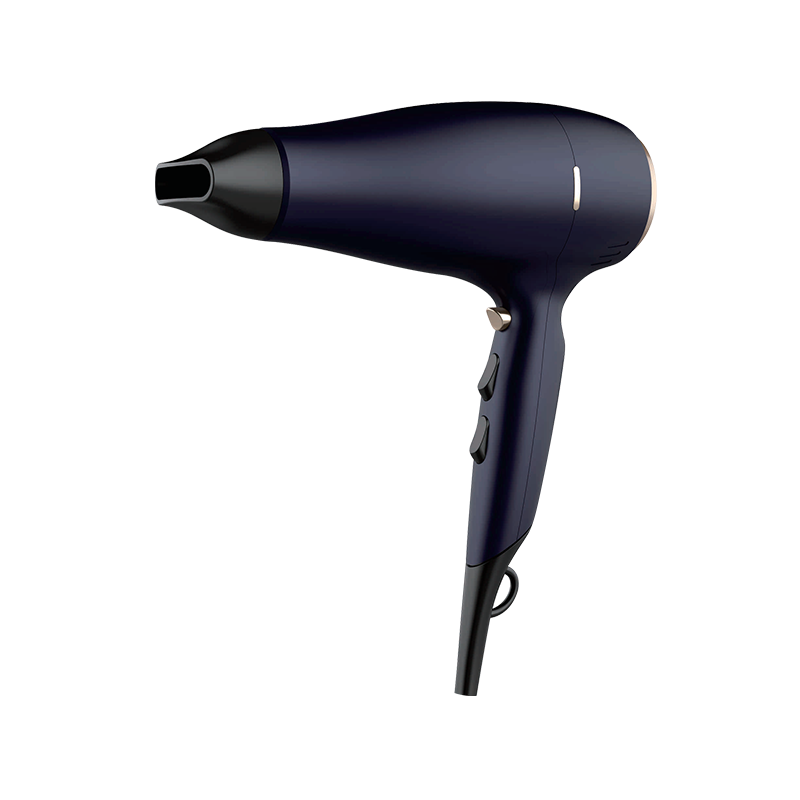
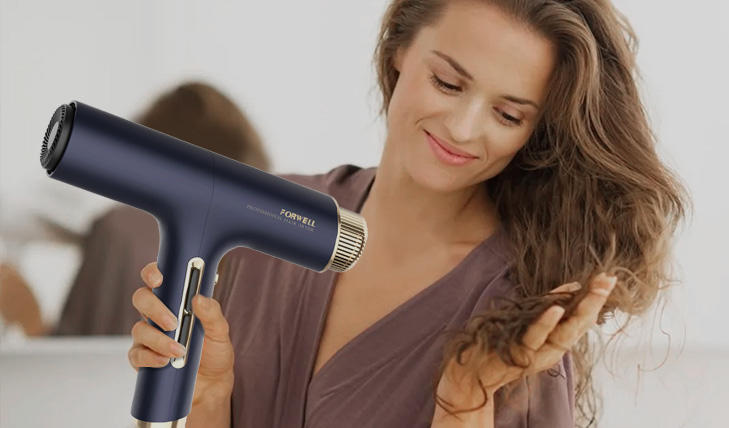
A voltage hot air brush combines the functions of a hairdryer and a styling brush in a single tool, offering convenience and efficiency in hair styling. Here's how it typically achieves this dual functionality: Hot Air Generation: Similar to a hairdryer, a voltage hot air brush is equipped with a heating element that produces hot air. This hot air is used to dry the hair efficiently. Brush Bristles: The hot air brush features a barrel or brush head with bristles, similar to those found on a styling brush. These bristles are designed to detangle and smooth the hair as it's being styled. Dual-Function Barrel: The barrel of the hot air brush is often designed to rotate or spin, allowing it to function as a styling brush. The rotating action helps in creating curls, waves, or a smooth straight finish, depending on the user's preference. Styling Control: Many voltage hot air brushes come with multiple heat and speed settings, giving users control over the styling process. This enables them to customize the heat and airflow according to their hair type and the desired style. Combining Steps: Unlike using a separate hairdryer and styling brush, a voltage hot air brush allows users to dry and style their hair simultaneously. This can significantly reduce styling time compared to using separate tools. Versatility: Voltage hot air brushes are versatile and can be used for various styling techniques, including straightening, volumizing, and creating curls or waves. The combination of hot air and the styling brush design facilitates a range of styling options. Reduced Frizz: The hot air produced by the brush helps in sealing the hair cuticles, reducing frizz and enhancing shine. This is particularly beneficial for achieving a polished and sleek finish during styling. Ease of Use: The integration of the hairdryer and styling brush functions into a single tool simplifies the styling process. Users can achieve their desired look with one hand, making it user-friendly for both beginners and experienced stylists. Time Efficiency: Combining the functions of a hairdryer and a styling brush in one tool can save time during the styling routine. Users can dry, shape, and style their hair in a single step, making it a convenient choice for those with busy schedules. In summary, a voltage hot air brush streamlines the hair styling process by integrating the functions of a hairdryer and a styling brush, providing users with a versatile and efficient tool for achieving various hairstyles.
VIEW FULL ARTICLE -
 Jan 15,2024 Forwell
How does the cool shot function on some Voltage Hot Air Brushes contribute to styling?
The cool shot function on Voltage Hot Air Brushes plays a crucial role in styling by providing a burst of cool air. This feature is typically used at the end of the styling process and offers several benefits: Setting Hairstyles: The cool shot function helps set the style in place. After using heat to shape and mold the hair, a blast of cool air helps lock the style, making it more resistant to humidity and external factors. Enhancing Shine: Cool air helps to close the hair cuticle, contributing to a smoother and shinier finish. This can result in a sleeker appearance and improved overall hair texture. Longer-Lasting Styles: By setting the style with cool air, the hot air brush helps ensure that the created hairstyle lasts longer. This is particularly beneficial for individuals who want their styling efforts to withstand daily activities. Reducing Frizz: The cool shot function aids in reducing frizz by sealing the hair cuticle. By closing the cuticle layer, the hair's outermost layer, the cool air helps prevent moisture from entering and causing frizz. Preventing Overheating: After using heat styling, especially at higher temperatures, the cool shot provides a gentle cooldown phase for the hair. This helps prevent excessive heat damage and maintains the overall health of the hair. Enhancing Volume: For individuals looking to add volume to their hair, the cool shot function can contribute to lift and hold. It helps set the roots and gives the hair a fuller appearance. Creating Texture: When used in conjunction with the styling brush or attachments, the cool shot function can help create defined textures and curls. It provides a finishing touch to the styling process. Improved Manageability: Cool air helps to tame flyaways and stray hairs, improving the overall manageability of the styled hair. This contributes to a polished and well-groomed look. Refreshing Styles: The cool shot function can be used throughout the day to refresh hairstyles. It's especially useful for individuals who want to revive their look without applying additional heat. Gentle Finish: The cool shot function provides a gentle and comfortable finish to the styling process. It's suitable for individuals who prefer a less intense cooling method compared to using room-temperature air. It's important to note that the cool shot function is typically activated by a separate button on the Voltage Hot Air Brush. Users can apply the cool shot as needed during the styling process or at the end to set the style. Incorporating the cool shot into the styling routine contributes to achieving the desired look while promoting hair health and longevity.
VIEW FULL ARTICLE
KEEP IN TOUCH
-

-

+ 86 - 574 - 63305579 / + 86 - 574 - 63321368
-

No.8 Wenti Road, Zhouxiang Town, Cixi City, Zhejiang Province, China.
QUICK LINKS
PRODUCTS
MOBILE TERMINAL
Copyright © Ningbo Forwell Electric Appliance Co., Ltd.. All Rights Reserved. Wholesale Hair Styling Tools
