 English
 中文简体
中文简体News Category:
Key Words:
-
 Jun 24,2024 Forwell
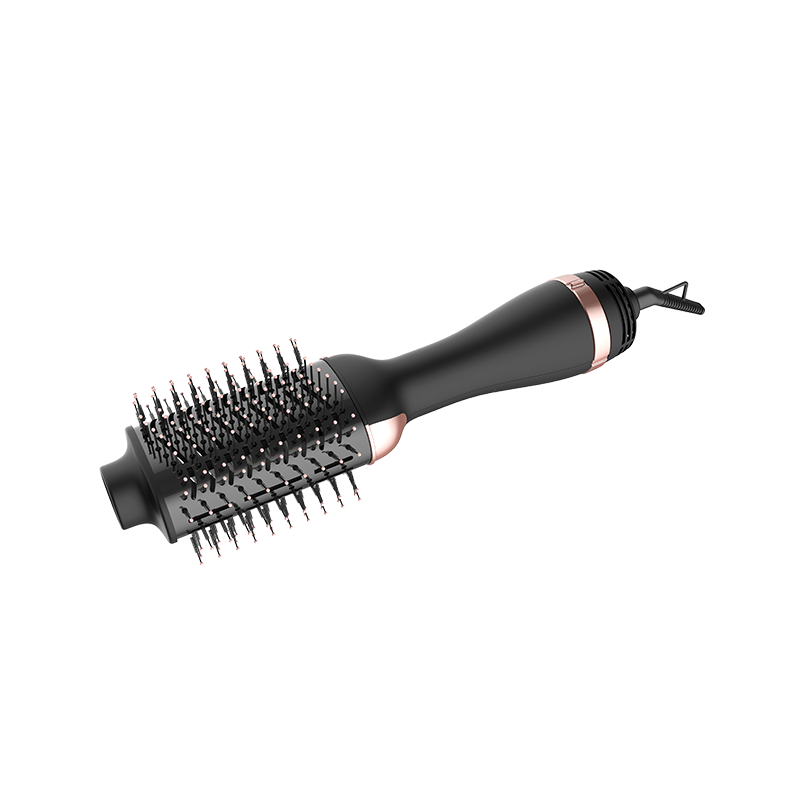
How is the constant temperature styling technology of Hot Air Brush?
In the hairdressing industry, an excellent hairdressing tool should not only have a good blowing effect, but also be able to protect the hair and make the hairstyle more durable. As a new star in hairdressing in recent years, Hot Air Brush has a unique constant temperature styling technology and has become a new favorite of many beauty lovers. 1. The core of constant temperature technologyThe key to the constant temperature styling technology of Hot Air Brush lies in its built-in intelligent temperature control system. This system can monitor the outlet temperature of the hair dryer in real time to ensure that the temperature is always controlled within a safe and effective range. Whether it is fine and soft hair or coarse and hard hair, it can get just the right thermal care. 2. The benefits of constant temperature for hairTraditional hair dryers often cause heat damage to hair due to improper temperature control, resulting in dryness, split ends and other problems. The constant temperature technology of Hot Air Brush can avoid this situation and keep the hair healthy during the blowing process. Moreover, the constant temperature technology can ensure that the hair maintains its natural luster after drying. Too high or too low temperature may cause the hair to lose its original luster, while the Hot Air Brush can ensure the styling effect while keeping the hair bright and colorful. 3. Application of constant temperature styling technologyHot Air Brush's constant temperature styling technology is not only used to dry hair, but also plays an important role in the styling process. Whether you want to create smooth straight hair or curly waves, you can achieve it by adjusting the temperature and wind power of the hair dryer. At the same time, due to the existence of constant temperature technology, these hairstyles can often be maintained for a longer time and are not easy to deform. 4. User experienceWhen using Hot Air Brush, users can clearly feel the comfortable experience brought by constant temperature technology. The wind is gentle and the temperature is moderate, so that the hair can be cared for while enjoying the process of blowing. At the same time, due to the reduction of heat damage and static electricity, the hair is easier to comb and style after drying. Hot Air Brush's constant temperature styling technology is a highlight among its many advantages. It not only protects the hair during the blow-drying process, but also helps users create healthy and long-lasting hairstyles. For those who pursue beauty and fashion, Hot Air Brush is undoubtedly a hairdressing tool worth owning.
VIEW FULL ARTICLE -
 Jun 17,2024 Forwell
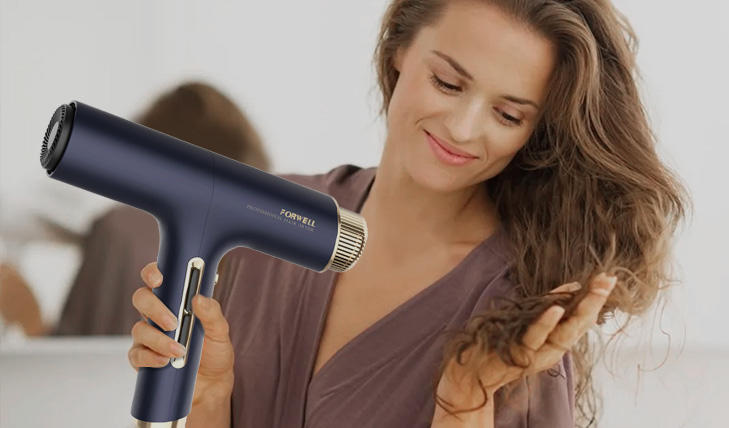
What is the safety performance of HD-185 Professional Hair Dryer?
Among modern beauty care tools, hair dryers are undoubtedly one of the most commonly used and important tools. With the diversification of hair dryer products on the market, safety performance has become one of the most concerned issues for consumers. The HD-185 Professional Hair Dryer has excellent safety performance and stands out among many hair dryer products. It is a popular choice for beauty home use. The HD-185 Professional Hair Dryer uses advanced NTC temperature control technology, which can monitor the temperature of the hair dryer outlet in real time to ensure that the temperature is always controlled within a safe range. Once the temperature exceeds the preset safety threshold, the hair dryer will automatically adjust the power or shut down, thereby avoiding the risks of burns, fires, etc. caused by overheating. This intelligent temperature control function not only ensures the safety of users, but also greatly extends the service life of the hair dryer. The HD-185 Professional Hair Dryer also does an excellent job in electrical safety. It uses high-quality electrical components and insulating materials to ensure the stability and safety of the circuit. At the same time, the hair dryer also has multiple protection mechanisms such as overcurrent, overvoltage, and undervoltage, which can quickly cut off the power supply when an electrical fault occurs, avoiding the occurrence of electrical fires. These safety measures provide users with all-round protection, making the use process more secure. In addition, the HD-185 Professional Hair Dryer is designed with the safety needs of users in mind. It adopts an ergonomic handle design, which is comfortable to hold and not easy to slip. The air outlet of the hair dryer is also carefully designed to avoid the possibility of hot air blowing directly to the user's face or eyes. This humanized design makes users more comfortable and safe during use. With its advanced NTC temperature control technology, electrical safety protection mechanism, and humanized design, the HD-185 Professional Hair Dryer has become a new benchmark for safety performance in the hair dryer industry. Whether it is a professional hairdresser or an ordinary consumer, you can rest assured to choose this product to enjoy a comfortable and safe hair blowing experience.
VIEW FULL ARTICLE -
Jun 10,2024 Forwell
Can professional hair styling tools be used on all hair types?
Professional hair styling tools can generally be used on most hair types, but it's essential to consider the specific characteristics of each tool and the needs of the individual's hair. Here's a breakdown: Hair Texture: Different hair styling tools may work better for certain hair textures. For example, flat irons and hair straighteners are commonly used on curly or wavy hair to achieve a sleek, straight look, while curling irons and wands are used to create curls or waves in straight hair. Hair Thickness: The thickness of the hair can also affect the choice of styling tool. Thicker hair may require higher heat settings or wider plates/barrels to effectively style, while finer hair may benefit from lower heat settings or smaller barrels to prevent damage and achieve desired results. Hair Condition: The condition of the hair, including its health, moisture level, and any previous damage, should be taken into account when selecting a styling tool and determining the appropriate heat settings. Using excessive heat on damaged or dry hair can lead to further damage and breakage. Heat Settings: Many professional hair styling tools offer adjustable heat settings to accommodate different hair types and styling preferences. It's important to use the appropriate heat setting for your hair type to minimize the risk of heat damage while still achieving the desired style. Specialized Tools: Some professional hair styling tools are specifically designed for certain hair types or styling needs. For example, there are curling irons with tapered barrels for creating natural-looking curls, as well as flat irons with floating plates for smoother results on thick or coarse hair. Consultation with Stylist: If you're unsure which styling tools are best suited for your hair type, consider consulting with a professional hairstylist. They can assess your hair's texture, thickness, and condition and recommend the most suitable tools and techniques for achieving your desired hairstyle while minimizing damage. While professional hair styling tools can be versatile and effective on various hair types, it's essential to use them properly and consider factors such as heat settings, technique, and hair care products to achieve the best results while maintaining the health and integrity of your hair.
VIEW FULL ARTICLE -
 Jun 03,2024 Forwell
How do you properly clean and maintain professional hair styling tools?
Proper cleaning and maintenance are essential for prolonging the lifespan and ensuring the optimal performance of professional hair styling tools. Here's a general guide on how to clean and maintain them: Unplug the Tool: Before cleaning any hair styling tool, always ensure that it is unplugged and completely cooled down to prevent any risk of burns or electrical hazards. Remove Residue: Use a soft, damp cloth or towel to wipe away any product residue, such as hairspray, gel, or styling cream, from the surface of the tool. For stubborn residue, you can use a mild cleaning solution recommended by the manufacturer. Clean the Plates or Barrel: For flat irons, hair straighteners, and curling irons, gently wipe the plates or barrel with a damp cloth to remove any buildup or residue. Avoid using abrasive cleaners or scrubbing pads, as they can damage the surface. Use a Cleaning Solution: Some manufacturers offer specialized cleaning solutions or wipes designed specifically for hair styling tools. Follow the instructions provided to safely and effectively clean the tool without causing damage. Clean the Ventilation Openings: If your hair dryer or styling tool has ventilation openings, use a soft brush or compressed air to remove any dust, lint, or debris that may have accumulated. Keeping the vents clean helps maintain proper airflow and prevents overheating. Inspect the Cord: Regularly check the power cord for any signs of wear or damage, such as fraying or exposed wires. If you notice any damage, discontinue use immediately and replace the cord or the entire tool if necessary. Store Properly: After cleaning, allow the hair styling tool to dry completely before storing it. Store the tool in a cool, dry place away from direct sunlight and humidity to prevent corrosion and damage. Avoid Immersion in Water: While it's essential to keep hair styling tools clean, avoid immersing them in water or exposing them to excessive moisture, as this can damage the internal components and electrical circuits. Regular Maintenance: Follow the manufacturer's recommendations for regular maintenance, such as lubricating hinges or replacing worn-out parts. Regular maintenance helps ensure the tool operates smoothly and extends its lifespan. Professional Servicing: If you encounter any issues with your hair styling tool, such as heating irregularities or unusual noises, consult a professional technician or contact the manufacturer for servicing or repairs. Attempting to repair the tool yourself may void the warranty or cause further damage. By following these cleaning and maintenance tips, you can keep your professional hair styling tools in excellent condition, ensuring they deliver consistent results and protect the health of your hair.
VIEW FULL ARTICLE -
 May 27,2024 Forwell
What is the heating technology used in the curling iron?
The heating technology used in curling irons can vary depending on the model and manufacturer. Here are some common heating technologies found in curling irons:Ceramic: Ceramic heating technology is popular in curling irons due to its ability to distribute heat evenly and maintain consistent temperatures across the barrel. Ceramic also emits far-infrared heat, which helps to heat the hair from the inside out, reducing heat damage and promoting smoother, shinier results.Tourmaline: Tourmaline is a semi-precious gemstone that is often infused into ceramic barrels or coatings on curling irons. Tourmaline emits negative ions when heated, which help to neutralize static electricity and reduce frizz in the hair. This results in smoother, silkier hair with less flyaways.Titanium: Titanium heating technology is known for its quick heating and high heat conductivity. Titanium curling irons heat up rapidly and can maintain stable temperatures, making them ideal for achieving fast and efficient styling results. Titanium barrels also provide smooth gliding action through the hair, reducing snagging and pulling.Nano Technology: Some curling irons incorporate nano technology, which involves the use of nano-sized particles or materials in the heating elements. Nano technology enhances heat distribution and helps to seal the hair cuticle, resulting in smoother, longer-lasting curls with less damage.Ionic Technology: Ionic technology is often used in conjunction with ceramic or tourmaline heating elements. Ionic curling irons emit negative ions that help to break down water molecules on the hair's surface, reducing drying time and static electricity. This technology can result in smoother, shinier curls with less frizz.Overall, the choice of heating technology in a curling iron depends on factors such as the desired styling results, hair type, and personal preferences. Each heating technology offers unique benefits in terms of heat distribution, styling efficiency, and hair health.
VIEW FULL ARTICLE -
 May 20,2024 Forwell
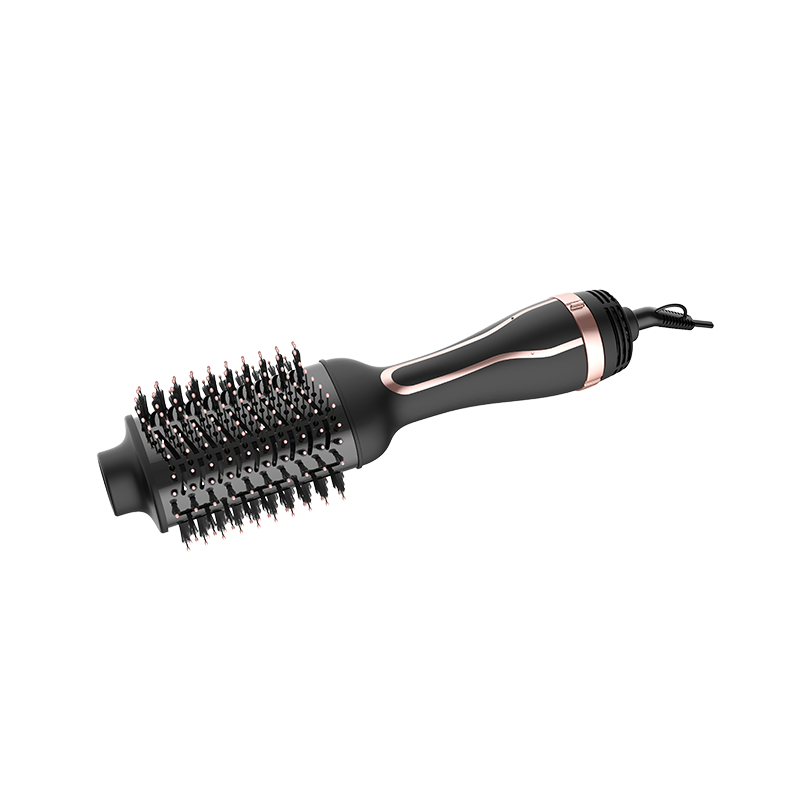
Does the hot air brush use ceramic, tourmaline, or other materials in the heating elements?
hot air brushes often incorporate ceramic, tourmaline, or a combination of both materials in their heating elements. Here's a breakdown of each:Ceramic: Ceramic is a popular choice for heating elements in hot air brushes due to its ability to distribute heat evenly and maintain consistent temperatures. Ceramic also emits far-infrared heat, which penetrates the hair shaft more effectively, reducing heat damage and promoting smoother, shinier results. Additionally, ceramic heating elements heat up quickly and provide consistent heat throughout the styling process.Tourmaline: Tourmaline is a semi-precious gemstone that is often crushed into a fine powder and infused into ceramic heating elements or coating on hot air brushes. Tourmaline has unique properties that emit negative ions when heated, helping to neutralize static and reduce frizz in the hair. This results in smoother, silkier hair with less flyaways. Tourmaline also enhances the efficiency of heat transfer, allowing for faster styling and reducing heat exposure to the hair.Other Materials: In addition to ceramic and tourmaline, some hot air brushes may incorporate other materials or technologies in their heating elements, such as titanium or nano-silver coatings. These materials may offer additional benefits such as enhanced durability, faster heating, or antimicrobial properties.Overall, the use of ceramic, tourmaline, or other advanced materials in the heating elements of hot air brushes helps to ensure efficient heat distribution, reduce heat damage to the hair, and enhance styling results for smoother, shinier, and healthier-looking hair.
VIEW FULL ARTICLE
KEEP IN TOUCH
-

-

+ 86 - 574 - 63305579 / + 86 - 574 - 63321368
-

No.8 Wenti Road, Zhouxiang Town, Cixi City, Zhejiang Province, China.
QUICK LINKS
PRODUCTS
MOBILE TERMINAL
Copyright © Ningbo Forwell Electric Appliance Co., Ltd.. All Rights Reserved. Wholesale Hair Styling Tools
